for what I titled "Operation Drafty". We have a fireplace in our Family Room and even with the damper closed, there is still quite a cold draft that leaks in, especially during the cold months.

So the wife and I wanted to create some kind of cover that could go over the fireplace when not in use to help block the cold air from coming in and I came up with an idea to incorporate felt as the covering material so it would double as a felt bard with which Bean could play. Design was fairly simple: flat piece of wood, some kind of filling, felt cover and then some handles on the sides.

One 4'x'4' 1/2" particle board - $9.79
36 square feet of carpet padding - $9.00
Two drawer handles - $4.58 ($2.29 each)
1.5 yards of black felt - $4.05 (wife had a 50% off coupon / would have been $8.10)
Total expense: $27.42
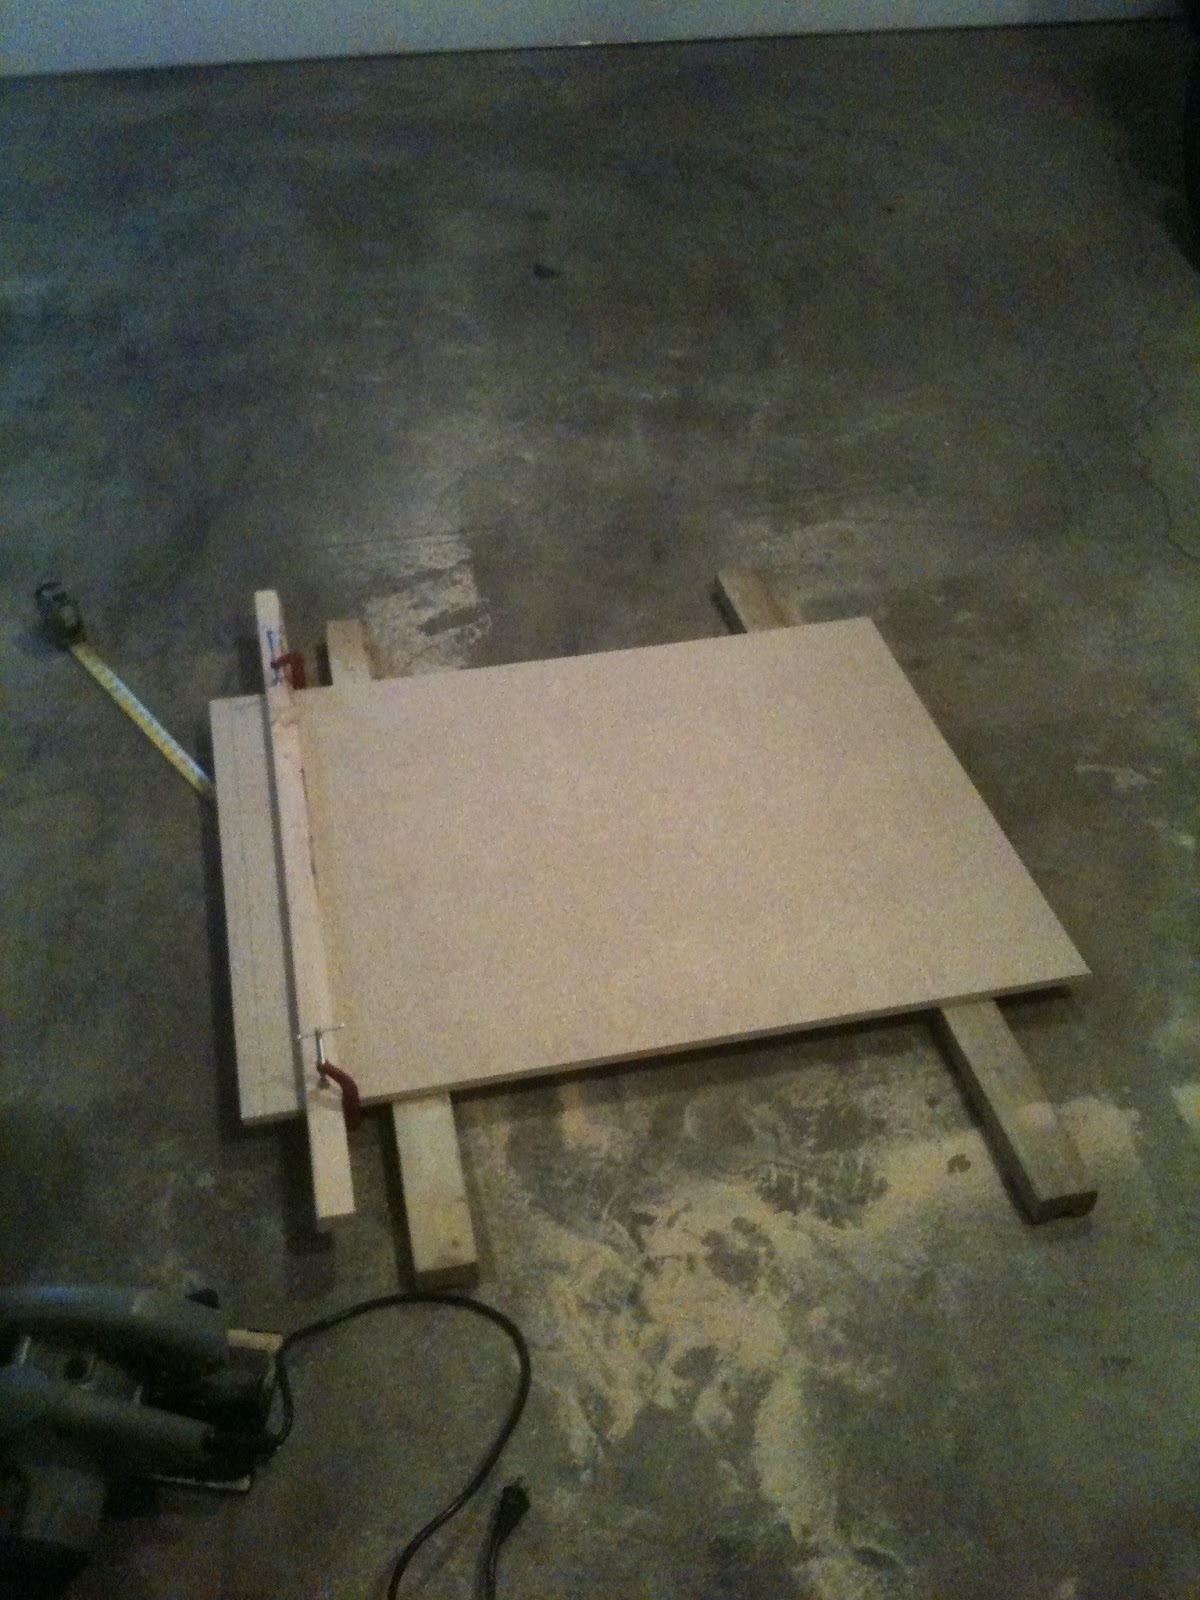
Step 1 was to cut the wood to size. This was harder than it sounds because the stones around the fireplace are not all even. So the distance across the fireplace opening ranged from 35.5" - 37". So I had to cut large, dry fit it, then cut some more. I don't have fancy power tools like table saws, so I had to rig a guide for cutting straight lines. I used a straight piece of lumber and clamped it to the wood I was cutting to function as a guide for my circular saw.

Once the wood was cut to size, I encountered my first unplanned challenge. The fireplace has glass doors with handles at the bottom that stick out about 1.5" causing the wood cover to stick out at the bottom. So now I had to make cutouts in the wood to accommodate the fireplace glass door handles. I used my carpenters square to transfer the location on the wood and then proceeded to drill some holes inside the lines and then cut the pieces out with a hand saw. I used my Dremel tool to sand it down and smooth out the rough spots.


The next part was a bit rough and required the wife and I to work together. we laid out the carpet padding first with the cut wood on top. We folded one side up and stapled it down. We then moved to the opposite side, pulling the padding tight and stapling. Don't pull too hard or the padding will simply tear apart - trust me.

Once the padding was on tight, we moved on to putting on the felt. But before we could do this, we realized we had another issue. I had drilled the holes for the hardware that would be installed last, but hadn't considered that the felt and padding would cover the holes completely. So we took some basic measurements (measured from the bottom up and marked the points on the measuring tape and then also measured in from the sides (basic x and y axis points). Once we had the measurements for the handle holes, we moved on to attaching the felt. Same process of pulling tight and stapling one side at a time. We always worked opposite to opposite site, allowing us to pull it tight evenly across.
When it was time to locate the holes for the hardware, I gave myself a little pat on the back for this idea. I got a big needle from the wife's sewing kit. I measured out approximately where the holes should be and was able to poke around with the needle until I located the holes. It worked really well without causing any damage to the felt or the padding. I could then poke the needle through the hole and swirl it around to help make a big enough hole to accommodate the screw for the handles.
Once I fished the screws through, I added a washer on the backside to increase the surface area of the head of the screw. Without this, there is a risk that the head of the crew could have ripped through the felt and/or the padding. Increasing the surface area of the head expands the downward pressure of the head of the screw as it is tightened as to reduce the probability of tearing through the fabrics.

When it came to the moment of truth, I failed...miserably. Remember how I said the bricks around the fireplace opening were uneven? Well, once I added the padding and the felt, I came in at about .25" too tall; it didn't fit. So I spent about a half hour pulling out all the staples along the top portion of board, peeled back the felt and the padding and proceeded to cut off about 1/2". I then peeled the padding and felt back up and stapled back down. Took a lot of adjusting and a lot of patience, but we nailed it.

The final fit was pretty good - still had some gaps on the sides and top, but that was to be expected. Ultimately, it serves it's purpose well and is doing a great job at blocking the draft from the fireplace. Now the wife and I just need to take the old felt remnants from her Arts & Crafts box and make some fun felt designs to put on the board.
Operation "Drafty" concluded as a success of one Sunday morning/afternoon and about $30 in materials.
Here is a better quality before and after photo of the fireplace cover.


I think it is also important to note two other minor projects completed this weekend. First, we installed a lock on the door leading to our garage to keep Bean from arbitrarily going out there since he can open the door now on his own.

Second little project was installing some under cabinet lights on Bean's play kitchen. Yes I said his play kitchen. The corner he plays in doesn't get a lot of light, so the wife and I picked up a little two pack of LED click lights. These bad boys came with double sided adhesive included and turn on/off with a click button that Bean can operate. Total expense - $5 (plus batteries).

No comments:
Post a Comment